How to Pack a Cricket Kit Bag for Match Day
A practical cricket kit-bag packing checklist for players and parents, with a dry-zone system, protective-equipment checks and a faster post-match unpack.
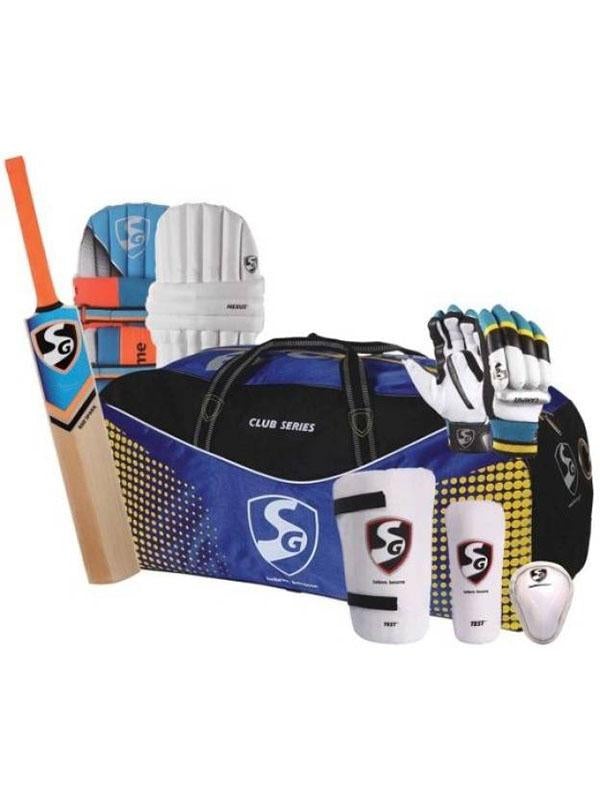
Pack by use and risk, not by throwing gear into the largest compartment. Put the bat in a padded sleeve or bat channel, keep spikes and hard balls away from the helmet and gloves, place clean protective equipment in a dry zone, and use separate bags for wet clothing, food and small essentials. Finish with a five-point door check: bat, helmet, gloves, abdominal guard and shoes. After the match, unpack everything the same day so damp gear can dry.
A packed bag should make match day easier
The purpose of a kit bag is not merely to hold everything. It should help the player find equipment quickly, protect fragile items and separate clean gear from mud, sweat and food.
Most packing failures are predictable:
- the abdominal guard is left at home
- both gloves are present, but they are from different pairs
- the helmet is crushed beneath shoes
- a loose hard ball marks the bat or grille
- wet clothing stays against pads overnight
- the drink bottle leaks through the main compartment
- a junior carries a bag too heavy to move safely
A simple packing system prevents more problems than a larger bag.
Start with the match requirements
Before packing, check:
- format and ball type
- whether the player is batting, keeping or both
- team clothing requirements
- surface and footwear rules
- expected weather
- what the club supplies
- whether the venue has changing rooms or limited storage
- transport and walking distance from the car park
New Zealand Cricket’s junior guidance requires core protective equipment for batters in its junior formats, including a helmet, gloves, batting pads and an abdominal guard where applicable. Local competition rules may add detail, so use the current playing conditions rather than last season’s memory.
Do not pack duplicate shared gear until the coach confirms what the team kit contains.
The master match-day checklist
Use this as a starting list, then remove items that do not apply.
Batting equipment
- match bat
- spare bat if genuinely needed
- batting gloves
- batting pads
- helmet
- abdominal guard and compatible briefs or supporter
- thigh guard
- optional arm, chest or elbow guard
Clothing
- match shirt
- match trousers
- playing socks
- base layer if permitted
- cap or sunhat
- warm layer
- wet-weather layer
- change of shirt
- clean underwear
- post-match footwear
Footwear
- cricket shoes matched to the surface
- spare laces
- approved replacement studs or tool only if the player knows how to use them
- slides or trainers for changing areas
Small essentials
- sunscreen
- water bottle
- personal medication carried according to the team’s plan
- towel
- tape or permitted personal strapping
- scoring pencil
- phone and keys in a secure pocket
- a small rubbish bag
- two waterproof or washable wet-gear bags
Role-specific extras
For a wicketkeeper:
- wicketkeeping gloves
- inner gloves
- wicketkeeping pads
- spare dry inners
For a bowler:
- surface-appropriate shoes
- a clean practice ball if requested
- towel for drying hands
For a junior:
- clearly labelled gear
- parent or guardian contact details where the club requires them
- simple snack the player already tolerates
- spare socks
Use a four-zone packing system
The easiest system is to assign every item to one of four zones.
| Zone | What belongs there | What stays out |
|---|---|---|
| Protected | Bat, helmet and fragile items | Loose balls, spikes, heavy bottles |
| Clean and dry | Gloves, pads, guards, clothing | Muddy shoes and wet towels |
| Dirty or wet | Shoes, used clothing, damp towel | Bat, helmet and clean gloves |
| Small essentials | Guard, inners, sunscreen, tape, keys | Large loose items |
The bag does not need four manufactured compartments. Lightweight washable inner bags or pouches can create the same separation.
Pack in the order you will need it
The best packing order depends on arrival routine. A practical sequence is:
- Place the bat in its sleeve or dedicated channel.
- Protect the helmet in a rigid or lightly loaded area.
- Pack pads along the sides to create structure.
- Put gloves and guards in a clean inner bag.
- Add folded match clothing in a dry compartment.
- Isolate shoes in a ventilated shoe section or washable bag.
- Put wicketkeeping extras together in one role-specific pouch.
- Secure small essentials in a zipped pocket.
- Keep food separate from used equipment.
- Put the drink bottle upright in an external holder where possible.
Items needed first—changing shoes, match shirt, sunscreen and guard—should not be buried beneath the bat and pads.
Protect the bat
A cricket bat can be damaged before the match begins if it shares a loose compartment with balls, metal studs or a leaking bottle.
Use:
- a padded bat channel or sleeve
- a toe position clear of pooled water
- support along the blade
- a closed zip that does not press into the bat
Do not:
- force a long bat diagonally into a short compartment
- stack a loaded wheel bag on the bat face
- leave a damp bat sealed beside wet clothing
- use the handle as a lifting strap
If the bat was damp at the previous session, it should already have been dried and checked before match morning. See how to store a cricket bat for the full routine.
Give the helmet its own safe space
The helmet should not carry the weight of the bag.
Before packing:
- check the shell for damage
- check grille position and fasteners
- check the chin strap and adjustment system
- make sure the interior is dry
Pack it upright or on its side in a compartment where spikes, hard balls and bottle lids cannot strike it. Do not fill the helmet with heavy items to save space. A light soft item such as a clean shirt may sit inside only if it does not stress the grille, lining or adjustment system.
If a helmet has taken a hard impact or shows damage, do not treat packing as the inspection. Follow the maker’s guidance and use our helmet replacement guide.
Keep footwear contained
Cricket shoes bring soil, moisture and sharp or hard studs into the bag.
Use a separate shoe compartment or washable shoe bag. Knock off loose mud outside, allow wet shoes to breathe and keep metal spikes away from:
- the bat face
- helmet shell and grille
- glove palms
- spare clothing
- phone and electronics
Do not seal soaked shoes for a long journey without airing them at the first opportunity.
The spikes versus rubber studs guide can help match footwear to the surface.
Pack pads without crushing them
Batting pads are useful structural items when placed along the bag sides. Keep the protective faces supported and the straps contained.
Avoid folding the main face sharply or placing a heavy helmet bag on a raised knee bolster.
Fasten or tuck straps so they cannot:
- wrap around a bat handle
- snag glove tabs
- jam a zip
- pull against another pad
Wicketkeeping pads are slimmer, but they still need to stay dry and uncrushed. Pack the pair together so one is not left in a changing room.
Small items need one home
The most frequently forgotten items are small.
Create one zipped “ready pouch” for:
- abdominal guard
- inner gloves
- spare laces
- sunscreen
- permitted tape
- keys
- any small tool
Return every item to that pouch after use. Do not scatter these items across side pockets.
For an abdominal guard, check that the guard and its briefs or supporter are packed together. The abdominal guard fit guide explains how the setup should sit.
Food and drink stay separate
Use a sealed lunch bag or dedicated clean section. Keep food away from:
- used gloves
- damp towels
- shoe compartments
- insect repellent or cleaning products
Carry the bottle in an external upright holder when possible. Check the lid before the bag goes into a vehicle.
Glass containers do not belong in a cricket kit bag. Follow the venue’s current rules for food, bottles and rubbish.
A junior player’s bag should be manageable
A young player should not need to drag an oversized adult bag containing unnecessary duplicates.
Parents can reduce weight by:
- confirming which team items are supplied
- packing one suitable bat
- removing old, outgrown or broken gear
- using smaller refillable bottles
- carrying food separately when practical
- choosing a wheel or duffle format the child can control
Label personal gear discreetly. Name labels help in shared changing rooms, but avoid displaying unnecessary personal information on the outside of the bag.
Our first cricket kit buying guide helps separate essentials from later upgrades. For NZ-specific bag formats and capacity choices, see this duffle and wheelie cricket-kit-bag comparison.
Wicketkeeper packing checklist
Wicketkeepers carry overlapping batting and keeping gear. Use separate pouches so similar-looking gloves are not confused.
Pack:
- wicketkeeping gloves
- the intended inner gloves
- one dry spare set of inners
- wicketkeeping pads
- batting gloves
- batting pads
- helmet
- abdominal guard
- towel
Keep the catching surfaces clean and away from dirt or leaking products. The wicketkeeping gloves guide covers fit, webbing and care.
Wet-weather additions
For a damp forecast, add:
- waterproof outer layer
- spare socks
- dry shirt
- absorbent towel
- separate bags for wet clothing and shoes
- dry cloth for the bat exterior
Waterproof inner bags manage wet clothing; they do not make it safe to leave damp equipment packed overnight.
If play stops in rain, separate the bat and helmet from soaked garments as soon as practical. Never speed-dry a bat or protective equipment beside a heater.
The five-point door check
Before leaving home, physically touch:
- bat
- helmet
- batting gloves
- abdominal guard setup
- cricket shoes
Then check the role-specific group: wicketkeeping gear, warm layer, medication and water.
This physical check is more reliable than looking at a closed bag and assuming yesterday’s contents are still complete.
The arrival routine
On arrival:
- Put the bag in the team’s designated safe area.
- Keep walkways and emergency access clear.
- Remove the changing items needed first.
- Check the playing surface before choosing footwear.
- Confirm the helmet and guard before warm-up.
- Keep valuables secured according to club guidance.
- Return unused gear to the bag rather than spreading it around the room.
A tidy footprint makes it easier to find equipment and reduces the chance of another player standing on a bat, helmet or gloves.
What to do immediately after the match
The packing system should reverse quickly.
Before leaving the venue
- count the bats
- match each pair of gloves and pads
- put wet clothing in its separate bag
- isolate muddy shoes
- close small-item pockets
- check the bench and under seats
- remove rubbish
At home the same day
Unpack the full bag. Do not leave it zipped until the next session.
Remove and air:
- bat
- helmet
- gloves
- batting and wicketkeeping pads
- shoes
- inners
- towel
- match clothing
Wipe the bag interior if it is dirty and leave compartments open to dry. Follow the care labels for every item.
The cleaning guide for pads, gloves and helmets gives a safe starting routine.
Weekly reset
Choose one day each week to:
- clear rubbish and old tape
- wash inner bags
- check shoe studs and laces
- inspect helmet condition
- pair gloves and pads
- refill sunscreen
- replace the rubbish bag
- charge any permitted electronic scorer
- update the checklist for the next venue
Remove outgrown, damaged and duplicate gear instead of carrying it all season.
Does the bag need wheels?
Choose the bag after listing the real kit.
| Situation | Duffle may suit | Wheel bag may suit |
|---|---|---|
| Junior with compact kit | Easy if size and straps fit the child | Useful when walking surfaces are smooth |
| Adult batter with full kit | Good for stairs and short carries | Reduces lifting over long paved distances |
| Wicketkeeper | Works if compartments are organised | Extra capacity can help with two pad and glove sets |
| Rough or wet ground | Easier to lift clear of mud | Wheels may be awkward or collect soil |
| Public transport | More controllable if compact | Helpful for weight, but check total dimensions |
Capacity without organisation produces a heavier mess. Prioritise usable compartments, strong zips, a protected bat area and a carrying method the player can control.
Printable short checklist
- Bat
- Helmet
- Batting gloves
- Batting pads
- Abdominal guard and supporter
- Thigh or optional guards
- Match clothing
- Socks
- Cricket shoes
- Water
- Sunscreen
- Towel
- Wet-gear bags
- Role-specific equipment
- Personal medication plan
- Keys and phone secured
Related guides
- How to buy your first cricket kit
- Junior cricket gear checklist
- How to store a cricket bat
- Cricket protective equipment guide
Sources and update notes
- New Zealand Cricket: ANZ Junior Game FAQs — current junior-format protective-equipment requirements.
- New Zealand Cricket equipment size guides — equipment measurement context.
- New Zealand Cricket Game On resource — junior hard-ball equipment and safety guidance.
- MCC Laws appendices — definitions of cricket implements and external protective equipment.
The packing sequence is an editorial workflow, not a competition rule. Always follow the venue, airline or competition’s current requirements when they apply.